If you’re looking for STEM activities for preschoolers, then look no further. Studies have shown that early childhood is the best time to be introduced to STEM. This is because that is when neural connections are being made. Concepts learned at this age provide a STEM learning foundation for later in life.
STEM education is an integrated approach to learning science, technology, engineering, and math. So, most STEM activities will combine subjects. This does not mean that the more subjects the STEM activity combines, the better it is. It just means that the nature of the project includes them.
In my years facilitating STEM programs at my library, I have tried many STEM activities found online with preschoolers. Thinking the internet had the best choices because of its wide range of updated sources, I was clearly wrong and felt ashamed to be a librarian. Most of the sources I found seemed to not understand the concept of STEM and its integrated and interdisciplinary nature. Luckily, I found the book Baby Steps to STEM by Jean Barbre. I chose these activities from the book because they have proven successful in giving children a head start on what they will be learning in school, plus they have a blast doing them.
Table of Contents
Nature Explorer

STEM Concepts
- Science (Earth Science)
- Technology (Simple tools)
- Math (Classification and patterns)
Materials
- Plastic storage bags
- Magnifying glass
- Plastic tray
Learning Outcome
Children will explore the outdoors and collect fallen flowers and leaves. You can help them notice the difference between living and nonliving things. They will learn about the life cycle of flowers, plants, and trees.
How To
Embark on a nature walk, acquiring with you a large plastic storage bag and a magnifying glass. As you walk, comment on what you see and hear. When you discover bugs or insects, stop and investigate everything you observe. Use a magnifying glass for a closer study of nature (living and nonliving). Gather flowers and leaves which have fallen on the floor and place them in the bag. Following the walk, talk to the kids about what they have learned. Place each item on the plastic tray for sorting and classifying. Have the children use the magnifying glass to inspect the materials carefully, seeing the dissimilarities in the natural elements.
Things To Say and Ask
- What do you notice when you use the magnifying glass?
- How many natural materials did we find?
- What does the flower petal feel like?
- How does it feel different than this tree bark?
- What are the differences between this flower petal and the leaf?
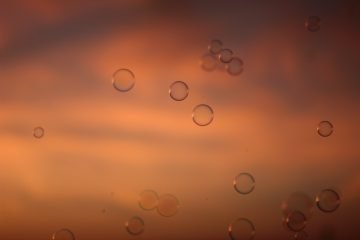
Bubble Joy
STEM Concepts
- Science (Physical Science)
- Technology (Simple tools)
- Math (Shapes)
Materials
- liquid bubble soap
- water
- large tub
- aprons or smocks
- towels
Learning Outcome
Bubbles are a great way to introduce the science concepts of chemistry, elasticity, light, and surface tension. Children will engage in the processes of observation and experimentation by playing with bubbles. They will examine the physical characteristics of water and the elasticity and shape of bubbles.
How To
Put a tiny bit of liquid bubble soap on the bottom of the tub then fill with water. Move your hands around to make as many bubbles as you can. Have the children watch as you create bubbles. Demonstrate how you can lift the bubbles and make mounds. Show how you can squeeze the bubbles between your fingers. Let a few children at a time make sculptures out of the bubbles. Show them how to blow on the bubbles and watch as they float in the air.
Things To Say and Ask
- I am going to put the liquid bubble soap in the tub.
- Watch bubbles form as I swish the water around with my hands.
- Look at how I can squeeze the bubbles with my hands.
- Who would like to join me?
- What do your hands feel? I feel the bubbles.
- Do your hands feel wet?
- Watch how the bubbles can grow.
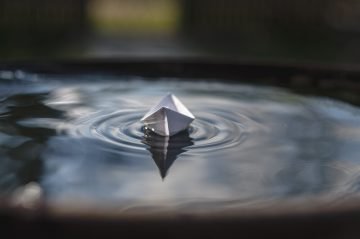
Boat Afloat
STEM Concepts
- Science (Physical science)
- Engineering (Engineering)
- Math (Number sense and operations, Measurement, Mathematical reasoning)
Materials
- clear plastic storage box
- water
- aluminum foil
- scissors
- mix of small plastic toys such as people, animals, or cars
Learning Outcome
Buoyancy is the power that makes an object float when placed in water. Things that are more dense than water will sink, while things that are less dense than water will float. Children will gain experience designing their boat and testing it to observe if the boat is buoyant.
How To
Tell the children that they will be building boats using aluminum foil. The aluminum foil boats will float on the water. Show them how to design a boat by bending up the edges of the foil to make a lip. Show them how foil can easily tear, so they will need to be gentle when they are making their boats. Allow the children to put their boats in the water when they are done to see if they float. Once they have tested to see if their boat can float, instruct them to continually add plastic toys to see how many the boat can hold before sinking. Explain how higher lips of the boat allows it to hold more objects.
Things To Say and Ask
- I am gently constructing my boat. We will fold the edges of the boat up to create a lip on the boat. This will help it stay above the water.
- I notice that you are thinking about different ways to construct your boats.
- It’s okay if your boat did not float. You can try again.
- How can you change the edges to allow your boat to stay afloat? Let’s see if it will float now.
More Bubble Fun
STEM Concepts
- Science (Physical science)
- Technology (Simple tools)
- Math (Shapes)
Materials
- several 8-ounce plastic water bottles
- scissors
- several medium-size socks
- dishwashing soap
- water
- measuring cup
- small bowl
Learning Outcome
Playing with bubbles is one of the best STEM activities for preschoolers because it shows science concepts such as chemistry, surface tension, light, and elasticity. Children will take part in the processes of observation and experimentation by playing with bubbles. They will learn about life science and the ability to use their lungs to blow air bubbles. They will also explore the physical properties of water and the elasticity and shapes of bubbles.
How To
Before starting this activity, allow the children to practice blowing by having them place their hands in front of their mouths as they exhale. This will let them experience of feeling the air blowing out of their lungs.
- Cut off the bottom of each water bottle using the scissors. Pull a sock over the bottom of each water bottle to cover the cut-off edge. Don’t allow the children to handle the bottle until the sock is snugly placed around the base because the edges may be sharp. Bring the sock up over the top of the bottle and fold it to give it a cuff. If the sock is too big, you can use a rubber band to secure it.
- Combine ¼ cup of dishwashing soap with ½ cup of water in the bowl or container, then swirl to mix.
- Put the bottom of the bottle in the bubble solution to get it soapy. Have the children blow into the top of the bottle to form bubbles. It should make a long worm-like bubble.
Things To Say and Ask
- Who wants to help me pour the dishwashing soap into the container?
- Who wants to help me pour the water into the container?
- What does the soapy liquid feel like?
- Do your hands feel wet?
Building Blocks
STEM Concepts
- Science (Physical science)
- Engineering
- Math (Spacial relationships, Measurement, Mathematical reasoning)
Materials
- cardboard blocks or stackable foam
Learning Outcome
Building is a process of engineering where children learn about balance, gravity, problem-solving, and spatial awareness. As they play with blocks, children will get experience with building and number sense. They will also learn about trial and error.
How To
Show how to stack soft blocks on a flat surface. Allow children to start building by themselves. If needed, stack a few blocks by yourself and then invite children to add on to your structure. Children learn how to build structures fast. Most of the fun is watching the blocks fall. When this happens, animate your expressions. As children build their structures, show them how starting a wide base can solve their problems by adding support and stability. Talk about how tall the tower is and count the blocks with them. Encourage the children to play with each other as they build their structure.
Things To Say and Ask
- It’s fun to stack blocks. Look at how high you can build it. Oops, it fell down!
- You need to start with a broad base if you want to build a tall building. I will show you how to do it. Put three blocks next to each other. Now, you can stack blocks on top. Great job!
- How high should we build it?
- Tell me about what you are building.
- Let’s see what happens if you add another block.
Balancing Act
STEM Concepts
- Science (Physical science)
- Engineering
- Math (Number sense and operations, Shapes, Spatial relationships)
Materials
- 10-12 inch cardboard circle
- 3-4 inch Styrofoam ball
- serrated knife
- glue gun
- items for balancing, such as seashells, rocks, animals, seashells, or plastic cars
Learning Outcome
A balance will tilt or stay steady and upstanding depending on each object’s weight and distribution on its surface. By moving or removing objects, you can make the weight more evenly distributed. Children gain experience experimenting with balance and weight as they learn how to keep the items from falling off the top of the cardboard circle.
How To
Cut the Styrofoam ball in half. Use only one half for the balance. With the glue gun, glue the flat side of the Styrofoam ball to the middle of the cardboard circle. Once the glue has cooled, slightly flatten the bottom of the Styrofoam ball slightly by using the knife to cut off ⅛ inch. This will keep the ball more upright for balance. Before you start, let the children examine the circle and Styrofoam balance. Explain how adding or removing items on the cardboard circle maintains the circle in balance. Have the children predict which items they can use to keep the cardboard circle upright. Have the children count and record the number of things they are able to stack on top of the cardboard circle before they fall off.
What To Say and Ask
- Let’s look at the balance. What shape is this? Yes, it’s a circle.
- The cardboard piece is flat and the Styrofoam piece has a round bottom.
- We’re going to see how many items we can place on the cardboard circle before it tips over.
Light Explorer
STEM Concepts
- Science (Physical science, Life science, Earth science)
- Technology (Simple tools)
- Math (Number sense and operations, Classification and patterns, Shapes and relationships, Measurement)
Materials
- light table (you can create your own by putting a flashlight in a box and covering it with parchment paper)
- variety of materials that have different amounts of transparency such as sand, buttons, buttons, tissue paper, keys, paint, rocks, buttons, sand, and seashells
- basket for collecting items
- magnifying glass
Learning Outcome
Light tables provide children with opportunities to increase their fine-motor skills as they explore and investigate. An object is transparent when light is transmitted or projected through it. Objects are made up of varying degrees of density and transparency. Light tables can be used to develop all areas of STEM. Children will enhance their understanding of light, density, and transparency while they explore the properties and characteristics of different materials using a light table.
How To
Tell the children to collect objects from the surrounding environment to place in a basket. Tell them to notice how each item looks and feels and to predict whether the light will shine through the items or not. Allow children to select dense items, such as rocks, pieces of wood, or seashells. Welcome the children to put the items on the light table and examine how they look with light underneath them. Next, have children examine other items that are more transparent, such as clear plastic or tissue paper. Help the children determine which items they can notice light through and which ones they can’t. Encourage children to use counting, sorting, and classifying the items on top of the light table. Allow children to use the magnifying glass to examine the items in more detail.
What To Say and Ask
- What materials are you using?
- What do you see when you look at the rocks and seashells?
- What happens when you place another rock on top of the other?
- Can you see the light through any of the seashells?
- What objects can you see the light through?
Source
Barbre, Jean. Baby Steps to STEM: Infant and Toddler Science, Technology, Engineering, and Math Activities. Redleaf Press, 2017.